Manual › Connect to AI (MCP)
For power usersConnect Mochii to AI (MCP) 🧩
Mochii can plug straight into Claude and other AI assistants. Once connected, you can say "make a project for the Acme migration with these five tasks" in plain English, and the assistant builds it in Mochii for you — acting as you, with exactly the access you already have. It works through a small bridge called the Mochii MCP server.
MCP (Model Context Protocol) is just a standard way to let an AI assistant use an app's features. Think of it as a universal plug: instead of copy-pasting between Claude and Mochii, you connect them once and the assistant can read and update your work directly.
What the assistant can do
With Mochii connected, an AI assistant can work with your real Mochii data. The connector has grown a lot — it now covers well over a hundred capabilities, grouped roughly like this:
- Projects, tasks & the basics — list, view, create, and update projects and tasks (priority, assignee, due date, hours), subtasks, sections, comments, dependencies, time entries, custom fields, and attachments.
- Teams & templates — teams and team members, task followers, project and task templates (including spinning up a whole new project from one), recurring task schedules, your notifications inbox, and the org activity feed.
- EOS & Traction — Rocks (plus Rock Milestones), Issues (plus voting), Scorecard, Headlines, L10 meetings (including the live meeting runtime — agenda, attendees, ratings), Annual Goals, Reviews, the Accountability Chart, and the People Analyzer.
- Leadership tools — Cascading Messages and Core Processes.
- AI & meetings — see what your AI agents are up to, and promote a meeting action item straight into a real task.
- Look-ups — find the right client or teammate to attach or assign work to.
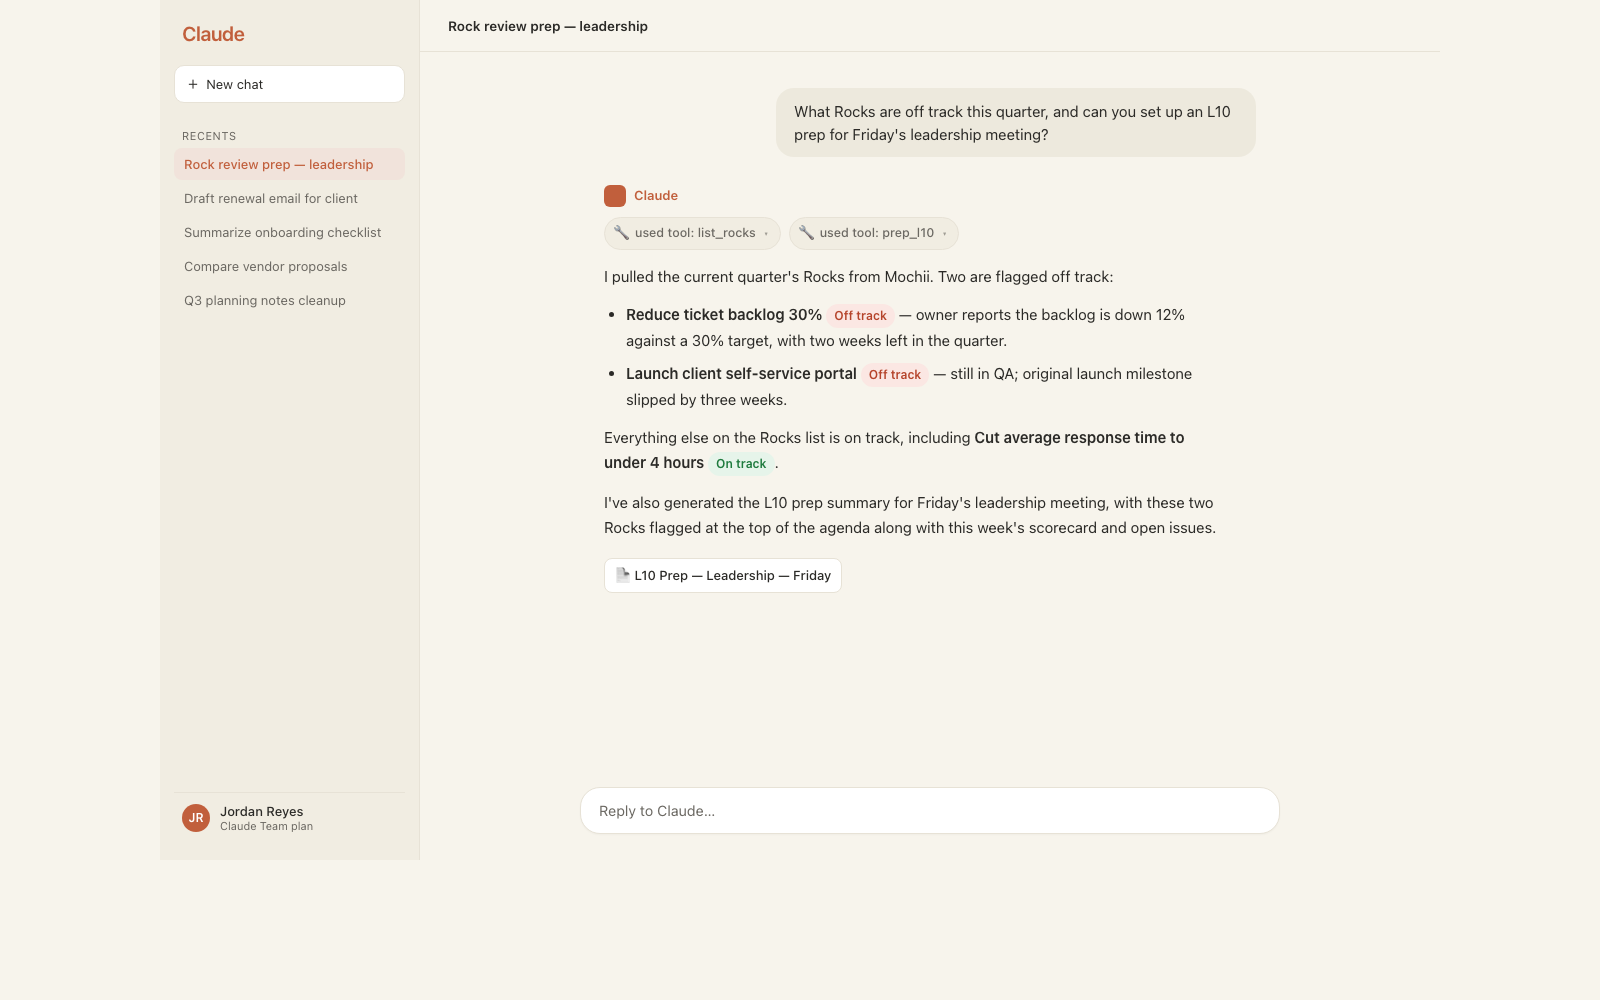
Asking Claude about your Rocks — it calls Mochii's tools right in the conversation.
Quick-start prompts & readable context
Beyond individual tools, the connector offers two extra conveniences for AI assistants that support them (Claude does):
- Prompts — six one-click templates that drive the tools above toward a finished deliverable: a weekly status report, a daily standup, an L10 prep, a quarterly-conversation prep, triaging your inbox, and a project health check. Instead of describing what you want step by step, you pick one and the assistant runs with it.
- Resources — a few standing views an assistant can read directly, like "my tasks," "my projects," "my inbox," and any specific project or task by opening it up. Handy for giving an assistant quick, structured context without a back-and-forth.
You may have heard of Nexus, the Chibitek system that helps Ask Bill remember things across the whole Chibitek suite. For everyday use there's nothing extra to set up — when Bill learns something useful while helping you in Mochii, it's shared through Nexus automatically. But Nexus also has its own separate connector, apart from Mochii's, for working with that memory directly from an AI assistant — searching and writing memories, reviewing meeting action items, daily briefs, and more. The two connectors do different jobs: Mochii's manages your projects and tasks; Nexus's manages your memory. Connect either or both. To add Nexus, follow the same steps as for Mochii below, but paste https://api.nexus.chibitek.com/mcp instead — the sign-in is the same Chibitek login.
Connect it in Claude
The easiest way — add Mochii as a custom connector:
- In Claude, open Settings → Connectors and choose Add custom connector.
- Paste the Mochii MCP address: https://mochii-mcp.chibitek.com/mcp
- Claude sends you to Chibitek sign-in — log in the same way you log in to Mochii (Microsoft or Google).
- Approve access. Mochii is now connected, and Claude can use the tools above.
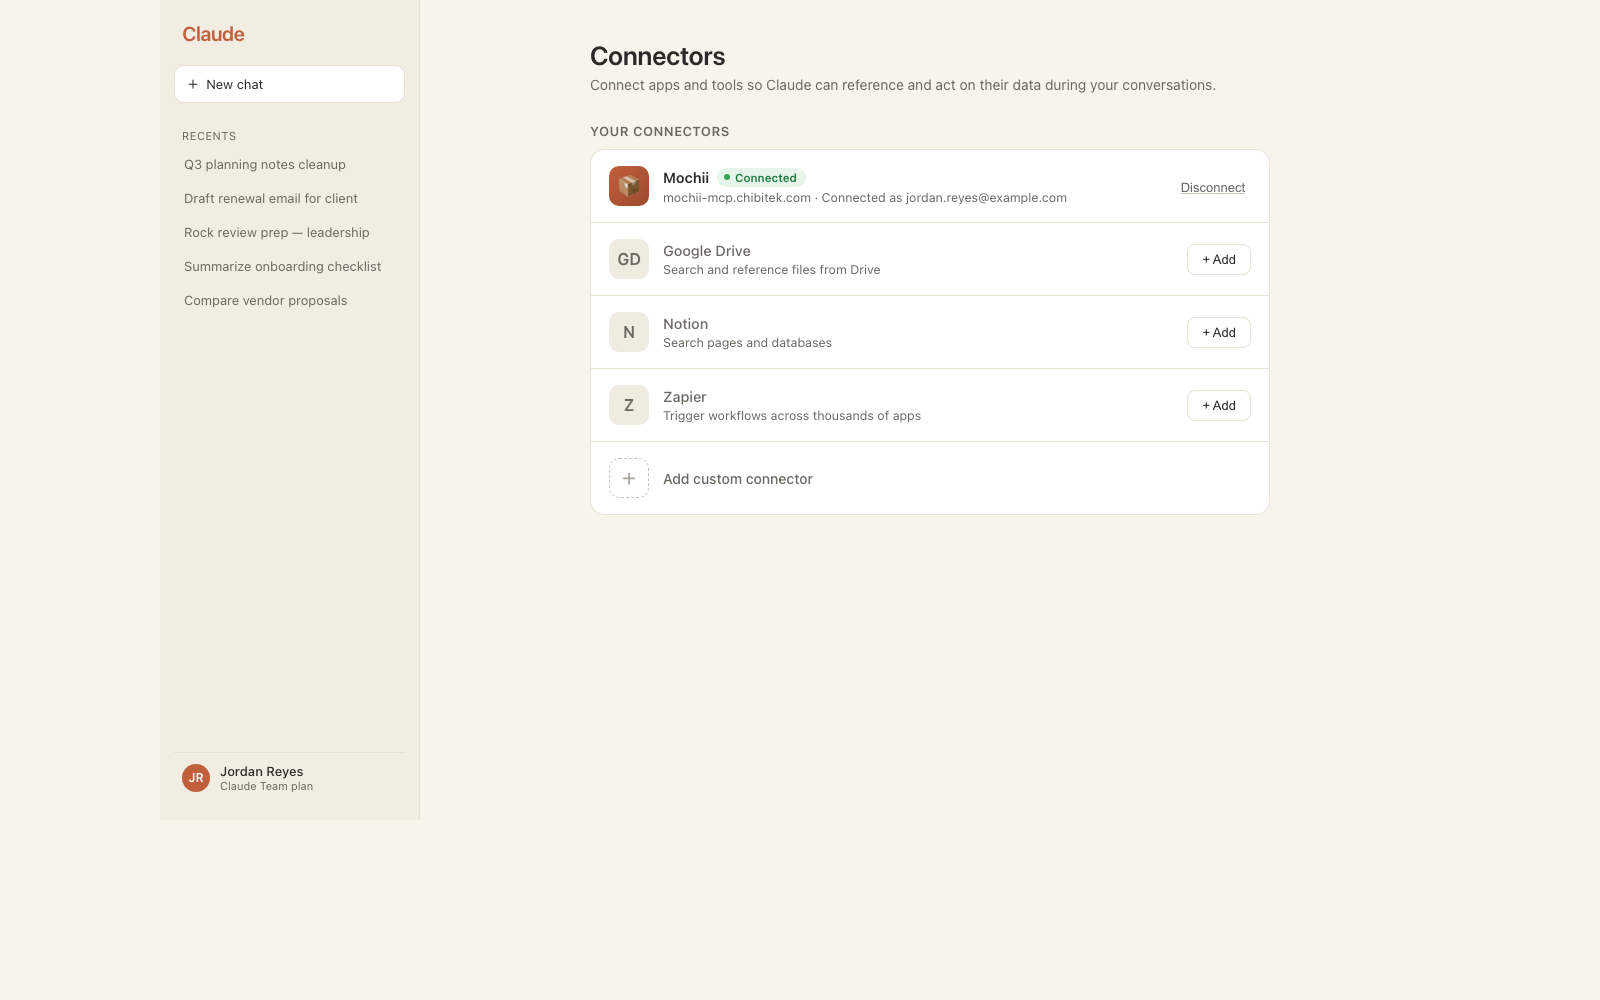
Mochii, connected — visible right in Claude's Connectors settings.
That's it — no API keys to copy, no passwords shared with the AI. The sign-in is the same Chibitek single sign-on you already use.
If you use Claude Code, you can add Mochii in one line:
claude mcp add --transport http mochii https://mochii-mcp.chibitek.com/mcp
It walks you through the same Chibitek sign-in.
Using a config file instead
Not every AI app has a "paste a connector URL" screen — some (desktop AI apps, IDE assistants, and other MCP-aware tools) want you to drop a small JSON snippet into a config file instead. Mochii's MCP server speaks plain HTTP, so for apps that only know how to launch a local command, add it through mcp-remote — a tiny bridge that runs the connection for you:
{
  "command": "npx",
  "args": [
    "-y",
    "mcp-remote",
    "https://mochii-mcp.chibitek.com/mcp"
  ],
  "env": {}
}
Where this goes depends on the app — usually under an mcpServers section in that app's config file, keyed by a name you pick (like "mochii"). Check that app's own docs for the exact file location.
The first time this runs, npx downloads mcp-remote and pops open a browser window for the same Chibitek sign-in as the other methods — nothing extra to configure, and no API key to paste into the JSON.
Use the Copy button on the box above rather than selecting the text by hand — some apps (Notes, Word, chat clients) auto-correct straight quotes into curly ones or swap in stray characters when you copy text out of a web page, and that will break the JSON. The Copy button grabs the exact original text every time.
Signing in & what it can touch
Connecting is safe by design, because the assistant never gets more than you have:
- You sign in with Chibitek SSO (the same login as Mochii). The AI never sees your password.
- It acts as you. Anything it creates or changes is stamped as yours, and it's limited to your organization — it can't see another company's data, and it can't see anything in Mochii you couldn't see yourself.
- It can read and write (the
mochii.readandmochii.writepermissions) — create and edit projects, tasks, and comments.
Because it acts with your permissions, a connected assistant can create, change, and delete the same things you can. Treat it like handing an assistant your seat — connect tools you trust, and review big changes. (Deletes are "soft" — items are hidden, not destroyed — so mistakes are recoverable.)
If your sign-in gets blocked
Access to Mochii is granted through Chibitek SSO. Most staff already have it. If connecting fails with a "not allowed" (403) message, ask an administrator to give your account Mochii access in the Chibitek admin — then try again.
Finer controls are on the way: read-only connections (let an assistant look but not change), assigning tasks to AI agents, and per-tool permission limits. Today a connection is all-or-nothing within your own access.
For developers: service keys
Building your own automation or bot (not a chat assistant)? Mochii also supports service API keys (they start with mochi_) that act as a dedicated bot identity instead of a person. These are issued by a Mochii administrator. If you need one, ask your admin — and see your administrator for the API details.
Quick recap
- The Mochii MCP server connects Mochii to Claude and other AI assistants.
- Add the connector https://mochii-mcp.chibitek.com/mcp in Claude and sign in with Chibitek.
- The assistant works with your projects, tasks, teams, templates, notifications, EOS & Traction, and more — as you, within your org, with your permissions.
- Six built-in Prompts and a handful of readable Resources give the assistant one-click deliverables and quick context.
- Nexus memory sharing needs no setup, but Nexus also has its own separate connector for working with suite memory directly — add it at https://api.nexus.chibitek.com/mcp.
- Blocked at sign-in? Ask an admin for Mochii access.
- Read-only and AI-agent assignees are coming soon.